
7 Mistakes You’re Making with Car Rust Proofing (And How to Fix Them Before Winter)
- Lloyd Saunders
- May 6
- 6 min read
Direct Answer: How to Avoid Rust Proofing Failure
The most common car rust proofing mistakes include applying coatings over dirt or moisture, using low-quality "quick-dry" sealants, and neglecting internal chassis cavities. In the UK, where road salt and high humidity are constant threats, these errors do more than fail, they can actually accelerate structural rot. To fix these before winter, you must prioritise a professional 72-hour process that includes deep steam cleaning, industrial drying, and internal cavity wax injection. The biggest mistake is waiting until rust becomes visible.
The Visual Mental Model: The Dental Hygiene of Your Vehicle
Think of rust proofing as dental care. Washing your car is like brushing your teeth, it removes surface debris. However, professional rust proofing is the equivalent of a long-term protective sealant or a filling. If you apply a "sealant" over a cavity without cleaning it out first, the decay continues to rot the tooth from the inside where you can't see it. By the time you feel pain, you need a root canal. In the automotive world, the "root canal" is expensive structural welding. Proper preparation ensures you aren't just sealing the decay inside.
The UK-Specific Corrosion Crisis
In the UK, we face a "perfect storm" for automotive oxidation. Our climate is persistently damp, and our local councils distribute over 2 million tonnes of salt on the roads every winter. This salt is hygroscopic, meaning it attracts and holds moisture against your vehicle's underbody.
In UK conditions, corrosion is not a question of if , but when. Standard factory protection is designed for global climates and is often insufficient for the aggressive chemical environment of a British winter. If you drive a vehicle in the UK, the underside is under constant attack from October through April.
Mistake 1: Skipping the Industrial Deep Clean
Most car owners believe a quick blast with a jet wash at a petrol station is enough preparation. It isn't. Road film, grease, and old salt deposits cling to the metal and hide in tight crevices.
Applying a rust proofing treatment over this layer of grime prevents the product from bonding to the steel. Instead, the coating sits on top of the dirt. Eventually, the dirt shifts or vibrates loose, taking the protective coating with it and leaving the metal exposed.
The Fix: Use high-pressure steam cleaning and dedicated degreasers. You must remove every trace of contaminants from the chassis, wheel arches, and suspension components before even considering an application.
Mistake 2: Trapping Moisture Under the Coating
This is the most dangerous error an owner or a cut-price garage can make. If the vehicle is not 100% dry before the sealant is applied, you are effectively "shrink-wrapping" water against the steel.
A poor rustproofing job can be worse than doing nothing, as it traps moisture and accelerates corrosion. This trapped moisture cannot evaporate; it sits in a warm, anaerobic environment, eating through your floor pans and sills twice as fast as it would have if left untreated.
The Fix: This requires a controlled environment and industrial heaters. At Rustec, we include a dedicated drying phase in our 72-hour Elite Standard to ensure no moisture remains in the seams or laps of the metal.
Mistake 3: The "Iceberg" Model – Ignoring Hidden Cavities
Visible rust is just the tip of the iceberg. Most vehicle corrosion starts from the inside out. Box sections, sills, and chassis rails collect condensation and salt spray through drain holes. If you only spray the visible underside (the "out of sight, out of mind" approach), the vehicle will continue to rot from within.
The Fix: You must use specialized lances to inject high-creep cavity waxes into every internal section of the chassis. These waxes are designed to remain flexible and "self-heal," ensuring that any internal moisture is displaced.
Mistake 4: Prioritising Product Over Process
Many owners spend hours debating the merits of different brands but ignore how the product is applied. You can use the most expensive wax in the world, but if it is sprayed over a damp, dirty surface, it will fail.
Process matters more than product. A "quick" afternoon service cannot possibly include the necessary cleaning, drying, and masking required for a long-lasting result.
Comparison: Rustec Elite Standard vs. Cheap "Quick-Spray" Services
Feature | Rustec Elite 72-Hour Standard | Cheap "Quick-Spray" Service |
Preparation | Industrial Steam Clean & Degrease | Basic Jet Wash or None |
Drying Time | 24 Hours + Industrial Heaters | 1-2 Hours (Air Dry) |
Masking | Exhaust, Brakes, Rubbers Protected | Overspray on Critical Parts |
Cavity Work | Full Injection of all Box Sections | Surface Only |
Longevity | Multi-year Durability | 6–12 Months |
Risk | Minimal - Expert Application | High - Trapped Moisture Risk |
Mistake 5: Waiting for Visible Bubbles
If you can see rust on your wheel arches or door bottoms, the structural integrity of the metal underneath is already compromised. The biggest mistake is waiting until rust becomes visible. By this stage, you aren't looking at rust proofing; you are looking at rust repair, which is significantly more expensive.
Doing nothing leads to financial loss. A vehicle with visible rot will fail its MOT and lose thousands in resale value.
When to Act: The Protection Window
0–3 Years (New Vehicles): Prevention stage. This is the best time to lock in the factory-fresh condition.
3–5 Years (Ideal Window): The critical period. Most factory coatings are failing by now. Treatment here prevents the "iceberg" from forming.
5+ Years: Urgent. If untreated, corrosion is likely already established in the cavities.
Visible Rust: Time-sensitive. Immediate intervention is required to stop the spread before the vehicle becomes an MOT failure.
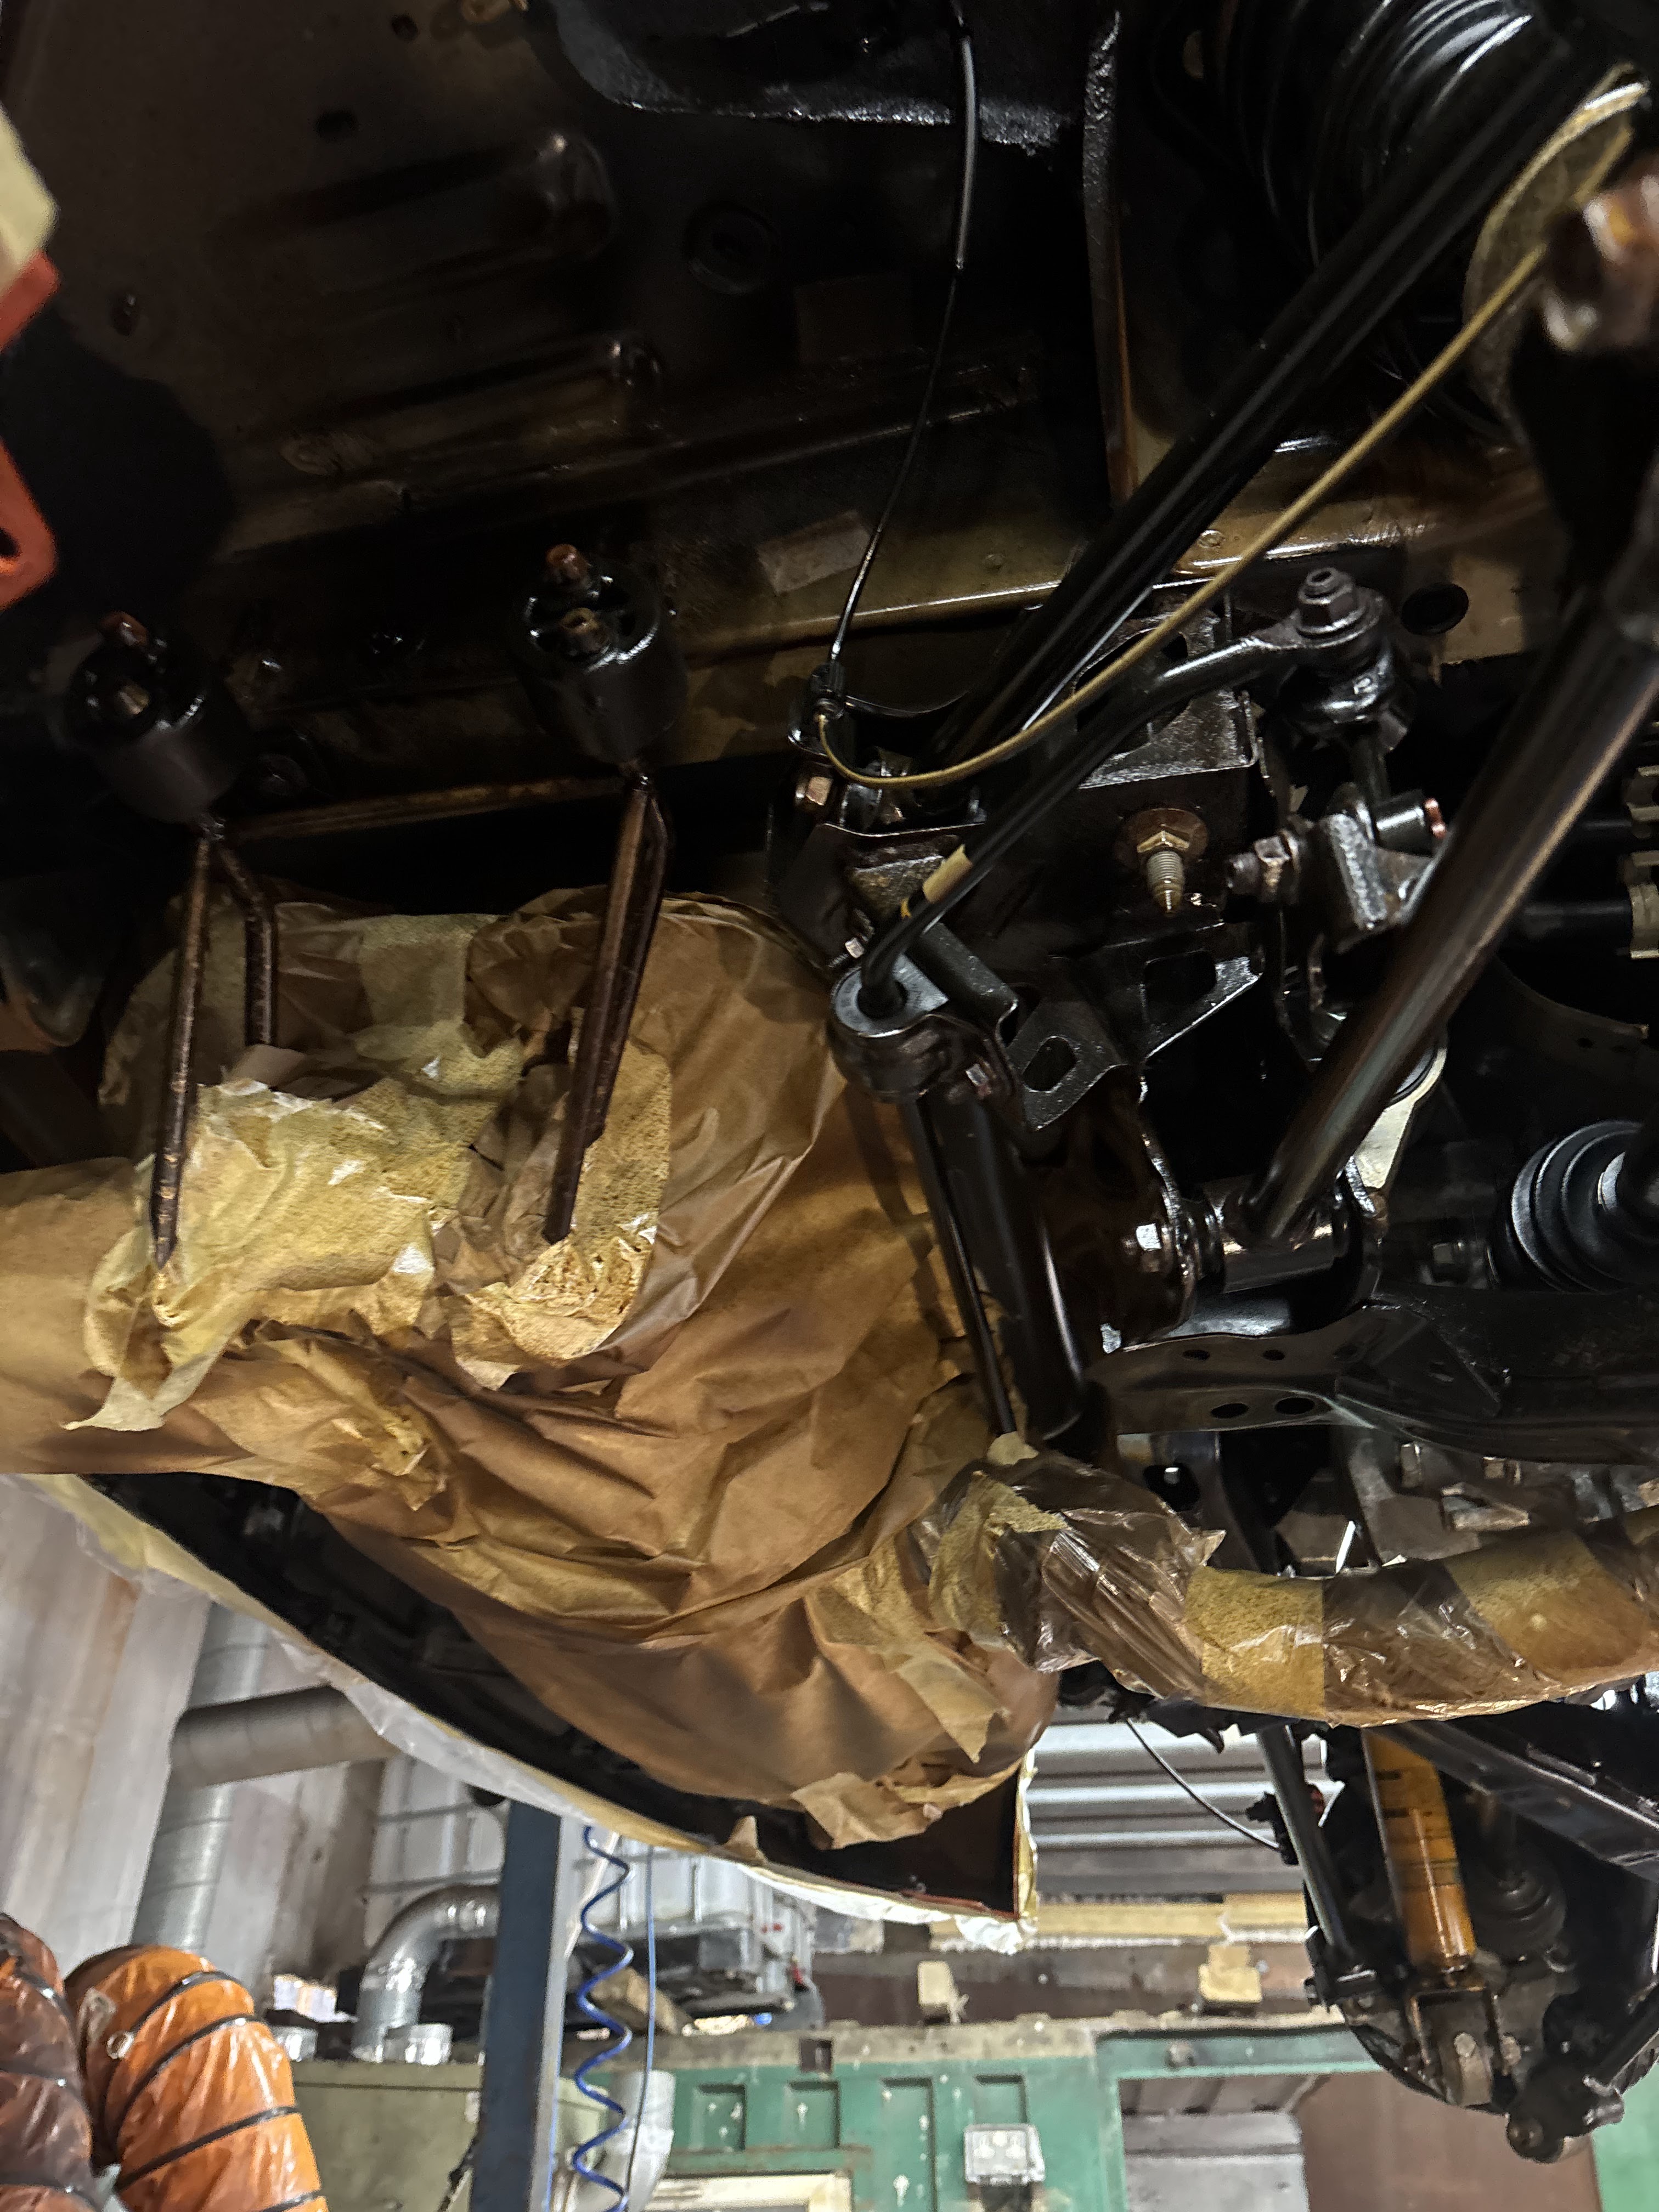
Mistake 6: Neglecting Masking and Over-spraying
DIY enthusiasts often spray everything under the car. This is a mistake. Rust proofing products should never be applied to the exhaust system (where they will burn and smell), brake discs (which will fail), or moving suspension joints (which can perish).
The Fix: Precise masking is essential. Components like the exhaust, brake assemblies, and electrical sensors must be wrapped in protective film or paper before application.

Mistake 7: Failing to Quantify the Financial Impact
Car owners often view rust proofing as a "cost" rather than an investment. However, the numbers tell a different story. In the UK, the cost of rustproofing in the UK typically ranges from £500 to £1,200 depending on the vehicle size.
Compare this to the alternatives:
Welding Repairs: £1,000–£4,000+ for structural MOT failures.
Resale Loss: £2,000–£5,000 reduction in value for a "crusty" or rusty underbody when selling a 4x4 or classic car.
Investing in a professional treatment doesn't just save the car; it saves your bank account.
The Rustec Elite Standard: Our 72-Hour Process
We don't believe in shortcuts. Our process is designed to eliminate the mistakes listed above:
Stage 1: Deep Clean. We remove all trim, splash guards, and heat shields before performing a high-pressure underbody steam clean.
Stage 2: Industrial Drying. The vehicle is placed in a controlled environment with industrial dehumidifiers for 24 hours.
Stage 3: Meticulous Masking. We wrap all sensitive components to ensure a clean, professional finish.
Stage 4: Cavity Injection. We use specialist probes to treat the internal structures that others miss.
Stage 5: Underbody Coating. A durable, high-performance barrier is applied to the exposed chassis.
Buyer Psychology: Avoiding the "Regret Trap"
Most of our clients come to us after seeing a friend's car fail an MOT or after finding a "surprise" during a routine service. They almost always say the same thing: "I wish I did this sooner."
The frustration of seeing a well-maintained vehicle scrapped because the "chassis went" is entirely preventable. By acting now, you ensure you never have to deal with the stress and expense of structural rot. Learn how long rustproofing lasts in the UK and why the best rustproofing method for UK vehicles involves more than just a surface spray.
Frequently Asked Questions
Does rustproofing increase resale value? Yes. A documented professional rust proofing treatment is a major selling point in the UK, especially for 4x4s, vans, and classic cars. It proves the owner has cared for the vehicle's long-term health. Discover more about how does rustproofing increase resale value on our dedicated guide.
Can I rustproof my car myself? You can, but you likely lack the lift, steam cleaners, and industrial drying equipment needed to avoid trapping moisture. DIY jobs often miss the critical internal cavities where rust starts.
Will rustproofing affect my MOT? Actually, it helps. By preventing structural corrosion, you avoid the most common causes of MOT failure for older vehicles. Professional coatings are translucent enough or applied in a way that allows inspectors to see the condition of the metal.
If you want to protect your vehicle properly : not just cover it up : the best time to act is before corrosion progresses. You can book a free inspection or request a quote here.
In UK conditions, corrosion is not a question of if : but when. Delaying turns prevention into welding bills and resale loss. Book your inspection now.
Related Rustec posts:
Meta Title: 7 Car Rust Proofing Mistakes to Avoid Before Winter | Rustec Meta Description: Avoid these 7 common car rust proofing mistakes. Learn why preparation and professional 72-hour standards are essential for UK winter protection. URL Slug: /car-rust-proofing-mistakes-winter-prevention/
Comments